


A beautiful new floor can quickly develop problems like warping, creaking, or bubbling if key installation steps are overlooked. Many flooring failures begin below the surface, especially with poor subfloor preparation and missing or incorrect moisture barriers. No matter the material, hardwood, laminate, vinyl, or tile, long-term success depends on building a strong foundation before the flooring is installed.
This guide explains the most common flooring installation mistakes and how to avoid them. One of the biggest is rushing subfloor preparation. The subfloor must be level, clean, dry, and stable, because any unevenness, dirt, or moisture can affect the final result and shorten the floor’s lifespan. Another major issue is underestimating moisture. Moisture can damage flooring materials, cause mold, and weaken adhesives, so testing moisture levels and using the right barrier when needed is essential.
The article also highlights decisions that affect long-term performance, such as selecting the right underlayment and allowing flooring materials to acclimate before installation. These early steps may seem minor, but they play a major role in durability and appearance over time.
By understanding these common mistakes, homeowners can plan better, avoid expensive repairs, and achieve a flooring installation that looks great and performs well for years.
Key Takeaways
- Flooring installation mistakes often begin with poor subfloor preparation and inadequate moisture control.
- A subfloor must be clean, dry, level, and stable to support long-term flooring performance.
- Moisture is one of the biggest threats to flooring because it can cause warping, buckling, mold, and adhesive failure.
- Installing the correct moisture barrier is essential, especially over concrete or in humid areas.
- Acclimating flooring materials before installation helps reduce expansion, contraction, and future damage.
- Choosing the right underlayment improves durability, comfort, and overall floor performance.
- Ignoring manufacturer instructions can lead to installation failure and may void product warranties.
- Proper expansion gaps around the edges help prevent buckling and movement over time.
- A clean work area during installation improves adhesion and helps avoid defects in the finished floor.
- Careful planning and attention to detail are the keys to achieving flooring that looks great and lasts for years.
Why Flooring Matters: Understanding Its Importance and Impact
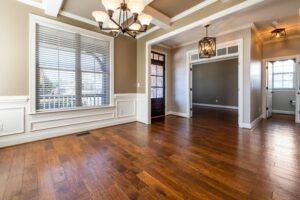
Flooring is one of the most impactful upgrades a homeowner can make because it shapes the look, comfort, function, and value of a home. It is not just a finish underfoot, but a key part of how a space feels and performs over time. Whether the material is hardwood, laminate, vinyl, tile, or carpet, the final result depends on more than appearance alone. The true success of a flooring project comes from combining the right material with the right installation process.
Flooring also carries both visual and financial importance. A well-installed floor can improve a room’s style, make the home more appealing to buyers, and increase overall property value. However, those benefits are only achieved when the installation is done correctly from the start. Many homeowners focus mainly on how the floor looks, but the hidden work underneath is just as important.
Subfloor preparation, moisture control, and proper installation methods all play a major role in long-term performance. If these steps are overlooked, the floor may soon develop issues such as warping, buckling, bubbling, gaps, or premature wear. A floor that seems perfect at first can quickly become a costly problem if the foundation beneath it is not prepared correctly.
This is why flooring should be seen as more than a decorative upgrade. It is a complete system that depends on planning, protection, and precision. Lasting results come from careful preparation, attention to detail, and an understanding that beauty alone is not enough. When the right materials are paired with proper installation, flooring becomes a long-term investment that adds durability, comfort, and value to the home.
How to Avoid Common Flooring Installation Mistakes Step by Step
When it comes to flooring installation, attention to detail can make the difference between a beautiful, durable floor and one that fails prematurely. Flooring installation mistakes often stem from skipping critical preparation steps such as proper subfloor prep, neglecting moisture barriers, or misunderstanding the flooring material’s requirements. To ensure your new floor not only looks stunning but performs well over time, follow this step-by-step guide on how to correctly approach flooring installation with a focus on avoiding typical errors.
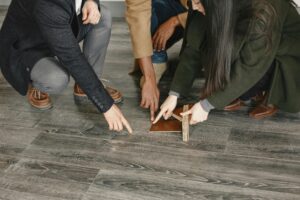
Assess and Prepare the Subfloor Thoroughly
The foundation of any flooring project is the subfloor. Even the best flooring material won’t perform well if the subfloor is uneven, damaged, or contaminated.
– Inspect for Damage and Moisture: Look for cracks, loose panels, or signs of water damage. Use a moisture meter to check moisture levels, as excess moisture can cause warping or mold growth.
– Level the Subfloor: Use a leveling compound or sand down high spots to ensure the surface is flat within manufacturer tolerances , usually within 3/16 inch over 10 feet.
– Clean the Subfloor: Remove dust, debris, grease, or any adhesive residues. A clean surface improves adhesion and prevents imperfections.
– Secure Loose Boards: Nail or screw down loose plywood or OSB panels to prevent squeaks or movement.
A well-prepared subfloor sets the stage for a smooth installation process and long-lasting flooring performance.
Install Appropriate Moisture Barriers
Moisture is one of the primary enemies of most flooring types, from hardwood to laminate or vinyl. Without proper moisture barriers, your floor can buckle, cup, or develop mold.
– Identify Moisture Sources: Determine if moisture could come from the ground (common in basements or slab foundations) or from humidity inside the home.
– Choose the Right Barrier: Depending on your flooring type, options include polyethylene sheets, specialized underlayments with vapor retarders, or liquid-applied membranes.
– Install with Care: Overlap seams at least 6 inches and tape edges securely to ensure a continuous barrier. Extend the moisture barrier up walls slightly if recommended.
For example, when installing engineered hardwood over concrete, a high-quality vapor barrier is essential to protect the floor from ground moisture and prevent irreversible damage.
Acclimate Flooring Materials Properly
Before installation, flooring materials, especially wood, need acclimation to the room’s temperature and humidity to minimize expansion or contraction later.
– Store Flooring in the Room: Unpack and spread out boxes for 48–72 hours at normal living conditions.
– Avoid Environmental Extremes: Don’t store near windows, heaters, or cold drafts.
– Check Manufacturer Guidelines: Some materials may require specific acclimation times or conditions.
Proper acclimation reduces stress on the flooring and keeps seams tight and boards stable for years.
Follow Manufacturer Guidelines for Installation
Every flooring type comes with manufacturer instructions tailored to its properties.
– Understand the Recommended Installation Method: Floating, glue-down, or nail-down installations require different subfloor prep and techniques.
– Use Specified Adhesives and Tools: Using incorrect glue or nails can compromise the floor’s integrity.
– Maintain Expansion Gaps: Flooring often needs space to expand at edges to accommodate temperature changes.
– Work Methodically: Install rows carefully to prevent misalignment or damage.
Respecting these guidelines prevents avoidable issues such as buckling, warping, or gaps forming soon after installation.
Conduct a Final Inspection and Maintenance Preparation
Once installation is complete, the work isn’t over. Final checks and preparations will help secure your flooring’s longevity.
– Check for Gaps and Defects: Inspect joints and edges for any irregularities.
– Remove Debris and Adhesive Residues: Clean with recommended methods to avoid damage.
– Educate on Long-Term Care: Use floor protectors under furniture, avoid excess water during cleaning, and regularly monitor moisture levels.
Real-Life Example: Avoiding Moisture Problems in Basement Flooring
Consider a homeowner installing laminate flooring in a basement. Ignoring the subfloor check, they blindly installed boards over concrete. After a rainy season, the floor buckled and cupped due to trapped moisture beneath, leading to costly repairs. Had they tested moisture levels and installed a vapor barrier initially, this common flooring installation mistake would have been easily prevented.
Summary Checklist for Flawless Flooring Installation
– Inspect and level the subfloor meticulously
– Install an effective moisture barrier tailored to the environment
– Acclimate flooring materials to room conditions beforehand
– Follow manufacturer instructions precisely
– Perform a detailed final inspection and plan for maintenance
By carefully preparing the subfloor, managing moisture, and following best practices, you can avoid the most frequent flooring installation mistakes and enjoy your floor’s beauty and durability for years to come.
Flooring installation is a craft where precision matters. Taking these step-by-step actions ensures your investment stands the test of time and wear, providing comfort and style for your living spaces.
Tips for Avoiding Flooring Installation Mistakes: Subfloor Prep, Moisture Barriers, and Long-Term Performance:
✅ Thoroughly Inspect and Prepare the Subfloor: Before installation, ensure your subfloor is clean, dry, and level. Uneven surfaces can cause flooring issues later, so patch any holes or cracks and sand down high spots.
❌ Don’t Skip Moisture Testing: Moisture is a flooring killer. Test the subfloor moisture levels using a reliable moisture meter to prevent warping, buckling, or mold growth down the line.
✅ Use Proper Moisture Barriers: Depending on your flooring type and subfloor material, install the correct moisture barrier. This is essential in basements or over concrete slabs to keep moisture away from sensitive flooring.
❌ Avoid Installing Flooring in High-Humidity Areas without Adequate Ventilation: Without proper airflow, moisture can accumulate beneath the flooring, leading to damage. Always ensure good room ventilation.
✅ Acclimate Flooring Materials Before Installation: Let wood or laminate flooring acclimate to the room’s temperature and humidity for at least 48 hours to minimize expansion or contraction post-installation.
❌ Don’t Ignore Manufacturer Guidelines: Each flooring product comes with specific installation instructions. Ignoring these can void warranties and cause premature failures.
✅ Invest in Quality Underlayment: Using an appropriate underlayment can improve comfort, sound absorption, and longevity. It also acts as a moisture barrier when needed.
💡 Extra Tip: Plan Expansion Gaps Carefully: Leave recommended gaps around the edges to allow for natural expansion and contraction of flooring materials, preventing buckling or gaps.
✅ Maintain Clean Work Environment During Installation: Dust and debris can interfere with adhesives and fit. Keep the area clean to ensure a smooth, lasting installation.
Following these tips will help you avoid common flooring installation mistakes, ensuring a beautiful and durable floor that performs well over time.
Key Concepts
Understanding the nuances behind flooring installation mistakes requires delving into foundational concepts that govern the longevity and performance of any floor surface. At the heart of these discussions lies the word flooring, but more than just the visible surface we walk upon, this term encompasses an intricate system of materials, preparations, and environmental interactions that dictate how a floor holds up through time.
The Flooring Ecosystem: More Than Meets the Eye
Imagine flooring as a carefully layered cake, each component contributing a unique flavor and texture to the final experience. The visible layer, the hardwood, tile, vinyl, or carpet, is only the frosting. Beneath that lies the subfloor, the moisture barrier, and the structural supports, all of which infuse durability and stability into the composition.
The term flooring thus transcends simple aesthetics; it embodies a complex assembly that is sensitive to preparation, materials interaction, and environmental factors. When these elements harmonize, the floor clears a path toward years of resilience and grace. When the harmony falters, the floor becomes a fragile stage prone to premature decay.
Subfloor Preparation: The Unsung Hero
In the symphony of flooring installation, the subfloor plays the role of the foundation, the conductor that ensures every note is perfectly pitched. Often overlooked, the subfloor is the structural base beneath the finished floor, usually made of plywood or concrete.
Neglecting proper subfloor preparation is like building a cathedral on sand. Even the most exquisite flooring can warp, buckle, or squeak if mounted atop an uneven, unstable, or contaminated base. The subfloor’s flatness, dryness, and strength set the conditions for a long-lasting floor.
Consider an analogy: if the finished floor is a tailored suit, then the subfloor is the frame of the body beneath. No matter how fine the fabric, ill-fitting foundations cause creases and misalignments. Therefore, in the flooring ecosystem, subfloor prep is an essential checkpoint that precedes all other efforts.
Moisture Barriers: Guardians Against Invisible Enemies
Moisture is the silent antagonist in many flooring sagas. Like an unseen infiltrator, excess water or humidity seeps upward from the ground or horizontally through walls, threatening the integrity of flooring materials. This is especially critical in basements, bathrooms, and kitchens, where water exposure is frequent.
Moisture barriers act as vigilant guardians, creating an invisible shield between the damp environment and the flooring materials. Their presence, or absence, can determine whether the floor becomes a flourishing landscape or a battlefield scarred by stains, mold, and warping.
Imagine moisture barriers as the raincoats in the wardrobe of a city dweller. Without that coat, the wearer becomes vulnerable to the elements, just as flooring lacking a moisture barrier becomes susceptible to damage. Importantly, moisture barriers are tailored to the specific needs of flooring type and environment, reminding us that one size does not fit all in this protective function.
Long-Term Performance: The Ultimate Measure
The concept of flooring naturally invites contemplation on its sustainability over time. Long-term performance is the cumulative result of all underlying processes: sound subfloor prep, appropriate moisture management, proper installation techniques, and mindful material selection.
Envision a floor as a narrative woven through years, each footstep a word, each stain a chapter. When installation mistakes are present, the narrative falters, riddled with plot holes like untimely buckling or unsightly gaps. When care is taken at each stage, the story flows smoothly, the chapter of durability extending indefinitely.
One might liken long-term performance to the art of bonsai cultivation. It is not enough to plant a seed (install flooring); meticulous pruning (correct preparation and barriers) and attentive care (maintenance reflecting the initial practices) shape an enduring living masterpiece. Flooring installed with precision and foresight rewards its owners with years of seamless service.
Interconnectivity of Concepts: A Delicate Balance
The concepts of subfloor prep, moisture barriers, and long-term performance are not isolated silos but interconnected facets of a delicate balance. Ignoring one can destabilize the others, much like a triadic dance where one missed step disrupts the entire choreography.
For example, an impeccable subfloor without moisture management is akin to a well-built boat with a leaky hull, sooner or later, water intrusion leads to rot. Similarly, moisture protection without stable subflooring is like protecting a fragile painting behind glass but placing it on a shaky easel, damage becomes inevitable.
This interconnectedness urges a holistic approach to flooring, not just focusing on the surface beauty but on every hidden layer and environmental factor that govern the floor’s fate.
Exploring flooring through these conceptual lenses reveals the significance beneath the surface. Mistakes during installation are less about isolated errors and more about ruptures in a complex system that relies on balance, precision, and harmony. By appreciating the role of each element, the subfloor as a steadfast base, moisture barriers as vigilant protectors, and the overarching goal of long-term performance, one begins to see flooring not simply as a home improvement detail but as a living structure demanding respect and understanding.
Frequently Asked Questions About Flooring Installation Mistakes to Avoid
❓ What is the importance of subfloor preparation in flooring installation?
Proper subfloor preparation is crucial because it ensures a level and stable base for your flooring. Neglecting this step can lead to uneven surfaces, creaking floors, and premature wear, ultimately compromising the long-term performance of your flooring.
❓ Why do I need a moisture barrier when installing flooring?
A moisture barrier helps prevent water vapor from rising through the subfloor and damaging your flooring materials. Without it, excess moisture can cause warping, mold growth, and adhesive failure, especially in basements or concrete slabs.
❓ Can I install new flooring over an old one without removing it?
While sometimes possible, installing new flooring over existing materials can trap moisture and conceal subfloor issues. This often leads to problems down the line, so it’s best to properly prepare or replace the subfloor before installation.
❓ How does improper installation affect the long-term performance of my floor?
Mistakes like skipping subfloor prep or moisture barriers can cause your floor to buckle, warp, or separate. These issues reduce the lifespan and durability of your flooring, resulting in costly repairs or replacement sooner than expected.
❓ What are common signs I’ve made flooring installation mistakes?
Look for uneven surfaces, gaps, bubbling, or moisture damage shortly after installation. These signs usually indicate problems with subfloor prep or moisture control that need to be addressed promptly to protect your investment.